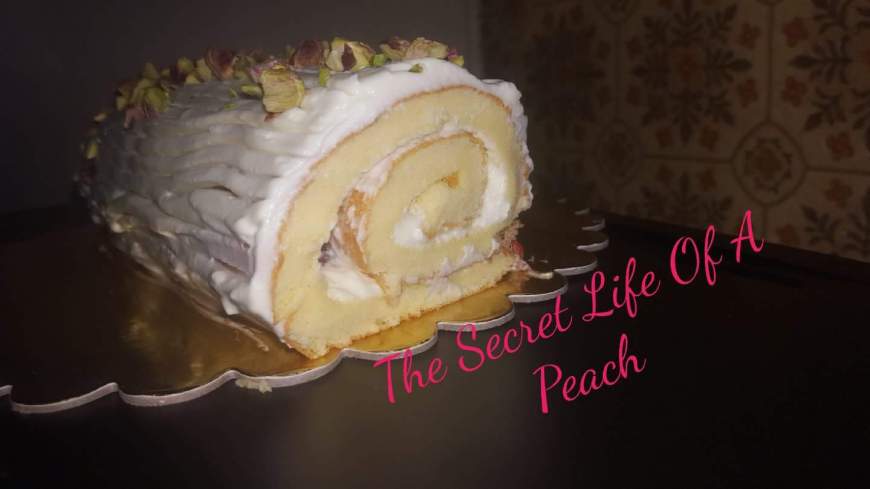
Strawberry and Pistachio Swiss Cake Roll

image

It’s been a while. I actually never stop baking. But lately I was baking again and again my favourite ones.
Last week saw a lot of tutorials about roll cakes so that inspired me to bake one. Never did a roll cake before. But I love them. Well… never tried a homemade roll cake. But you can find a good one in the bakeries or the grocery shops.
Today I did one. Actually I am really surprised how quick and easy it was. A little disappointed in fact. I like challenges. Of course the result is a delicious homemade dessert.
Now if you want to try my recipe for it you won’t need to go shopping. It is really simple one.
Here is what you need.
For the sponge:
4 eggs at room t°
120g granulated sugar
1 teaspoon boiling water
60g of all-purpose flour
1/3 teaspoon baking powder
1/4 teaspoon almond extract
1/4 teaspoon cream of tartar
For the filling:
3/4 cup whipping cream
1/2 teaspoon almond extract
70g powdered sugar
4-5 tablespoons strawberry jam
For the topping chop around 50g of pistachios.
Now preheat the oven at 170°C. Grease and cover with baking paper a baking pan. Mine is 27×36cm and around 1,5-2cm high.
Let’s first separate the egg whites and the egg yolks in two bowls.
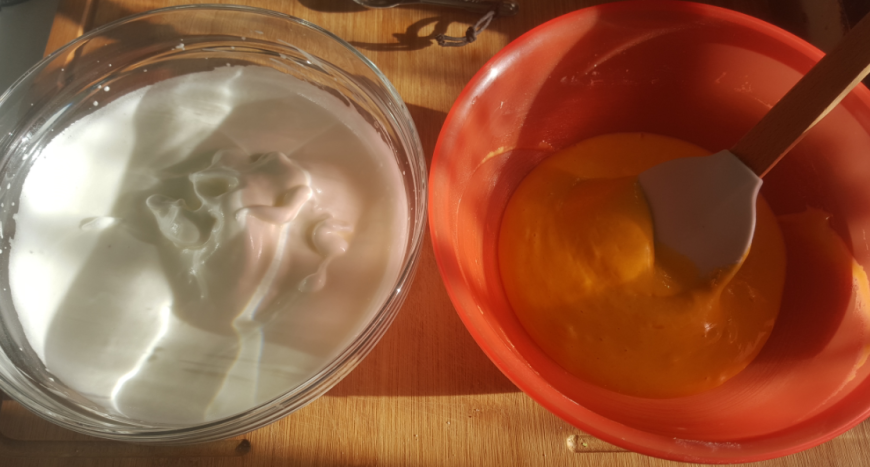
Mix the yolks and add the half of the sugar to them (60g). Mix it again and add the almond extract and the water. Of course if you prefer you can use vanilla. But I am in love with the almond extract so I use it everywhere 😀 Mix till homogenous. Then sift in there the flour and the baking powder. Mix again till all the flour is incorporated. Put it aside.
In the bowl with the egg whites add the cream of tartar and start mixing. Add the sugar gradually. Mix till soft peaks start forming.

image

Add about 1/3 of the egg whites in the batter and mix carefully with a wooden spoon. When homogenous add the rest and mix it again. Try to keep as much as volume as you can.
Pour the batter in the pan and bake between 10-13 minutes.
Here I will share with you a new trick I’ve learned about 10 days ago. And it really changed my life… or ok… not my life but at least I don’t cut my fingers with the bread knife anymore(it happened to me 2-3 times in the past and believe me it hurts!) Yes… the trick- when you put out your cake from the oven, cover with clean towel and press it gently with some flat surface for about 30 seconds. And it’s done- perfectly flat cake! Do you know what it means?!- No more trimming. Cake is perfectly leveled for 30 seconds!
Now you can try it right now with this one and use it in the future.
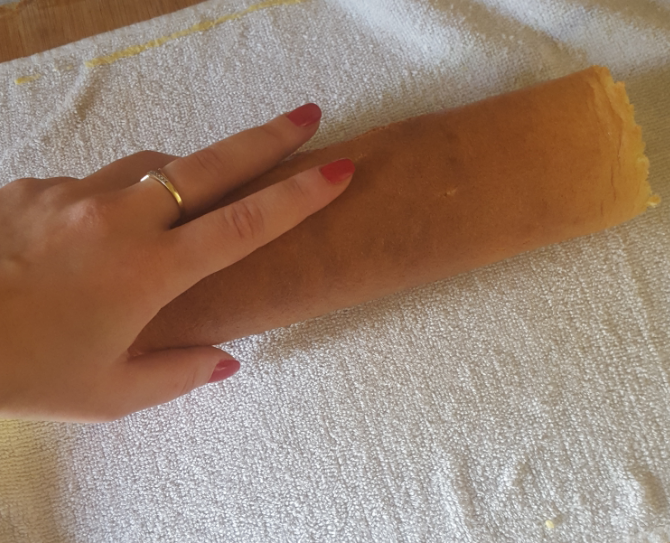
Now… put a sheet of baking paper to cover your cake, then a clean towel and turn it around. Be careful. You don’t want it ti break.
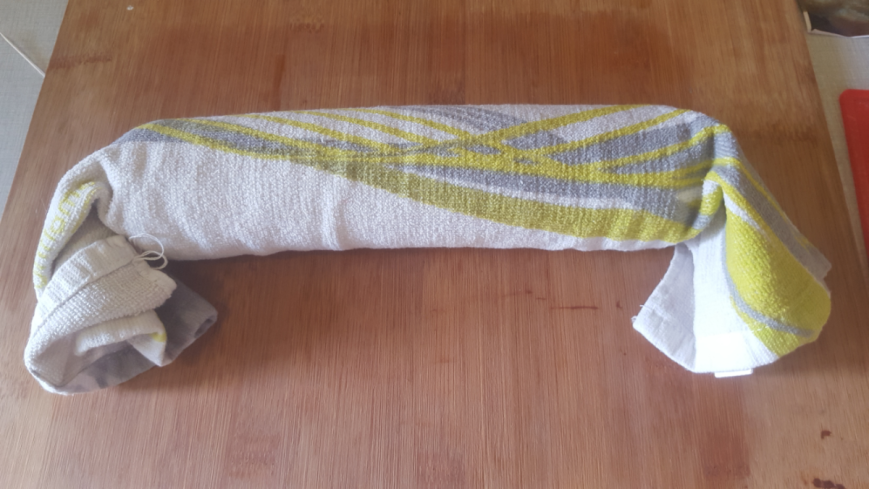
When cake is out you need to roll it. Make it carefully and tightly. Then pack it with the towel and let it cool for around 10 minutes.

image

image

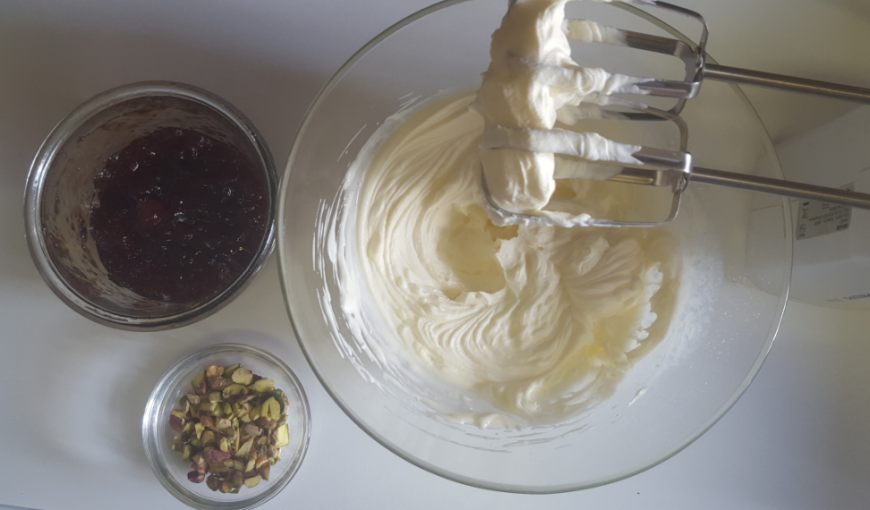
Meanwhile you can prepare the filling. Pour the whipping cream, powdered sugar and extract in a bowl and mix several minutes till cream is thick enough.

image

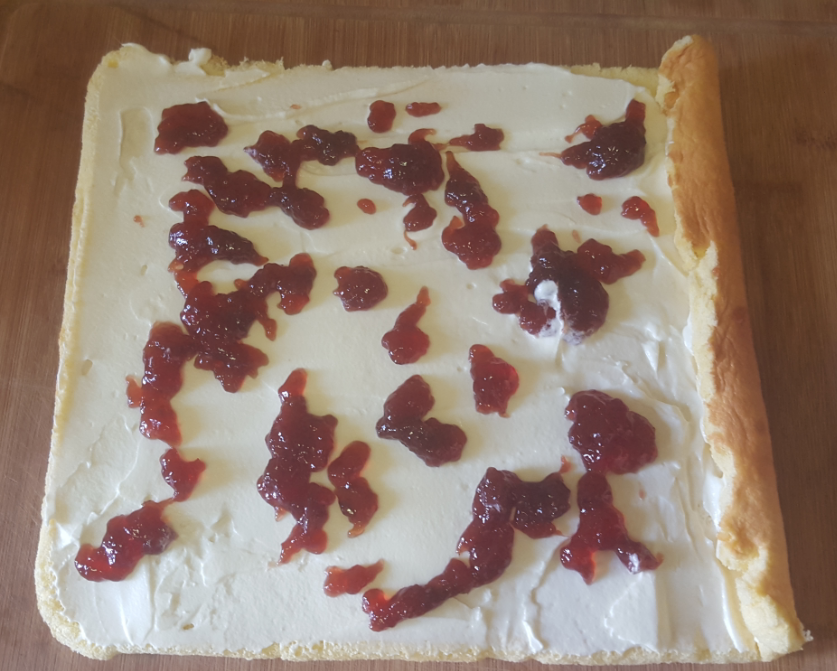
Roll out the sponge carefully. Spread generously some cream and strawberry jam.

image

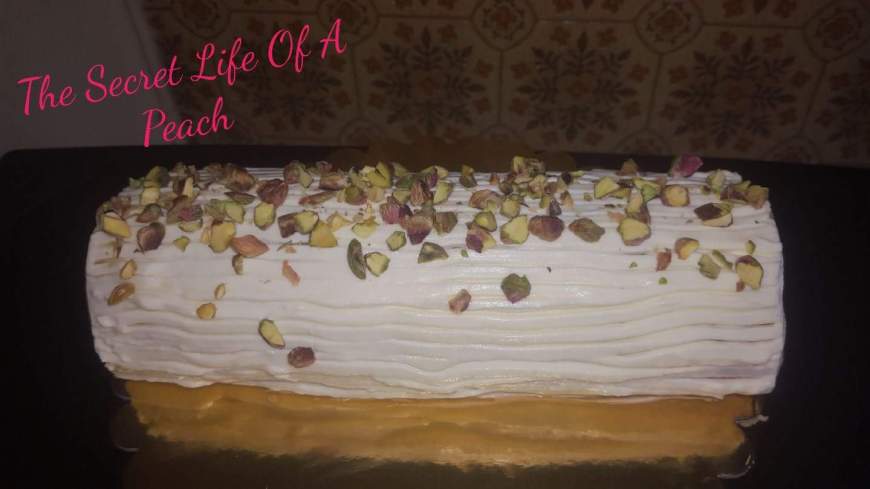
Roll it again. Cover with the rest of the cream and spread the chopped pistachios. Trim the two ends of the roll if you need to. But do it gently. 

image

Let it rest at least 1 hour in the fridge before serving.
Enjoy!

Bon Appétit!
Christina

Tropical Cake

image

Here I am again- obsessed of my oven. Reaaaly want to put something in there. It’s raining outside so really don’t feel like going shopping. Then should try to use what I have at home and create something delicious.
I notice a can of pineapple. Hmmm… That sounds like tropical cake, no? I can add also some bananas and try to do some glaze with the juice of the pineapple.
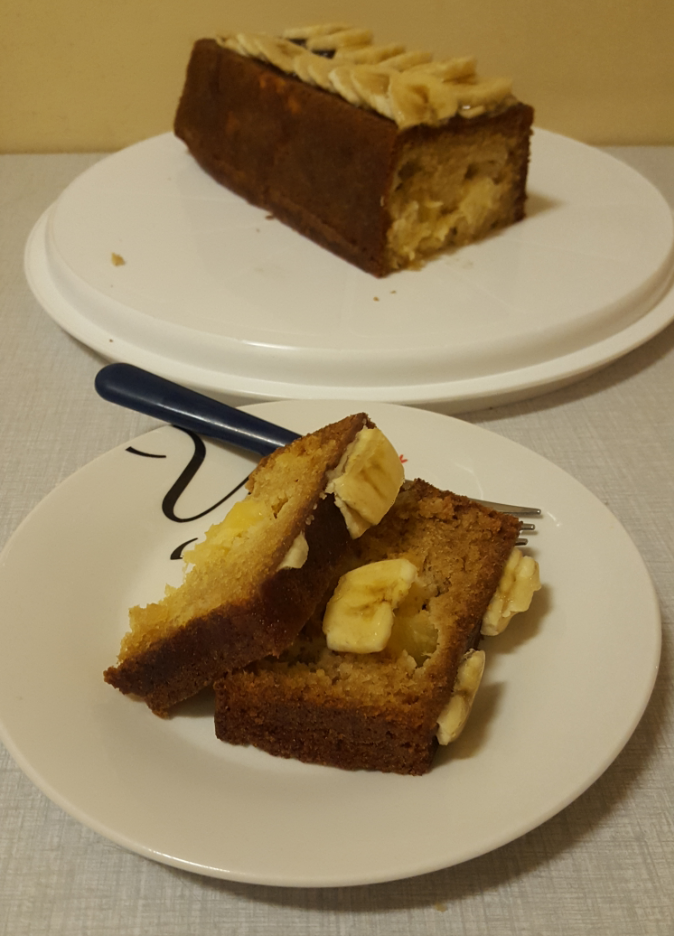
So after about an hour and a half I had a great tropical cake. It smells great and it tastes delicious!
Here’s what you need:
4 eggs
240g of sugar
240g of cake flour
1 teaspoon vanilla extract
2 teaspoons baking soda
170ml vegetable oil  (I used peanut oil because that’s what I had)
1 can pineapples (340g)
1 banana
1/2 lime
3 tablespoons of powdered sugar
2 sheets of gelatin
Preheat the oven at 180°C. Grease and cover with baking paper a rectangular bread mould (26×12cm).
Sift together flour and baking soda. In second bowl first mix sugar and eggs till fluffy. Add vanilla extract(if you have pineapple extract you can use it instead of the vanilla).
Now add around 1/3 of the flour and 1/3 of the oil. Mix with a spoon till incorporated. Add the rest of the flour and oil and continue till homogenous.
It’s time to add the finely chopped pineapple(no juice there. Keep it in a glass for later). Mix and pour in the bread mould. It goes in the oven for around 35-40 minutes or when a toothpick goes out clean.
Leave it cool around 10 minutes in the mould and then carefully turn it around so your cake is out. Leave it cool completely on a kitchen rack.
Now you can go back to the pineapple juice. We’ll use it for our tropical glaze.
Use around 100ml of the pineapple juice. Add the juice of 1/2 lime. That goes in a small saucepan. Add the sugar and let it boil.
Put the gelatin sheets in cool water for around 5 minutes. After put them in the fruit juice and remove from the heat. Let it cool for a while.
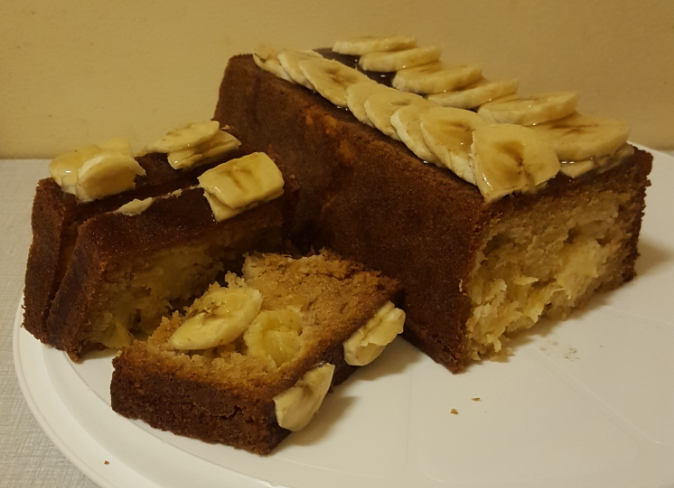
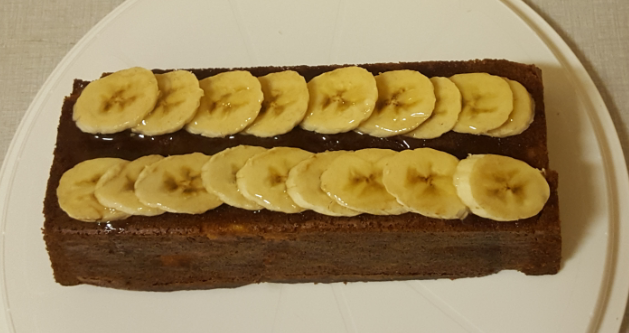
Cut a banana to thin slices and decorate your cake. Take the tropical juice and with a spoon pour over the bananas. It’s getting thick really quickly so after a minute you should have just a thin layer of jelly.

image

Well that was pretty simple but the result is great. And it goes perfectly with your cup of tea!
Hope you’ll try it! And of course that you will like it!
See you soon!

image

Bon Appétit!
Christina

White and Dark Chocolate Cake

image

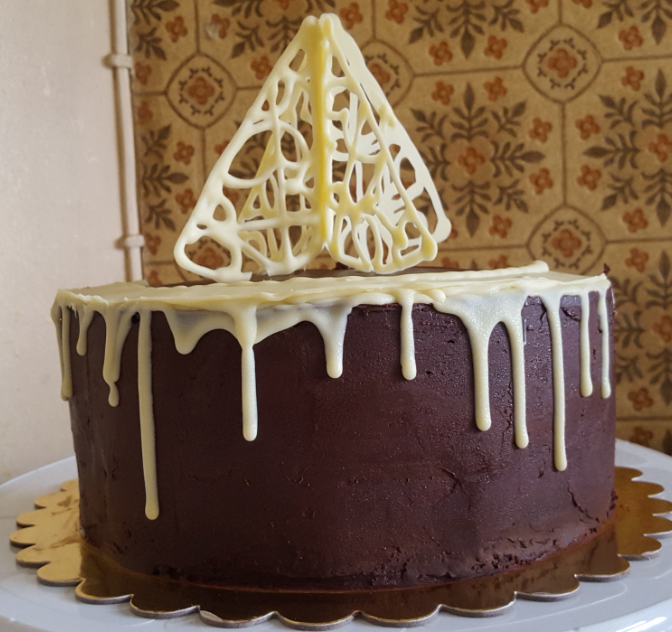
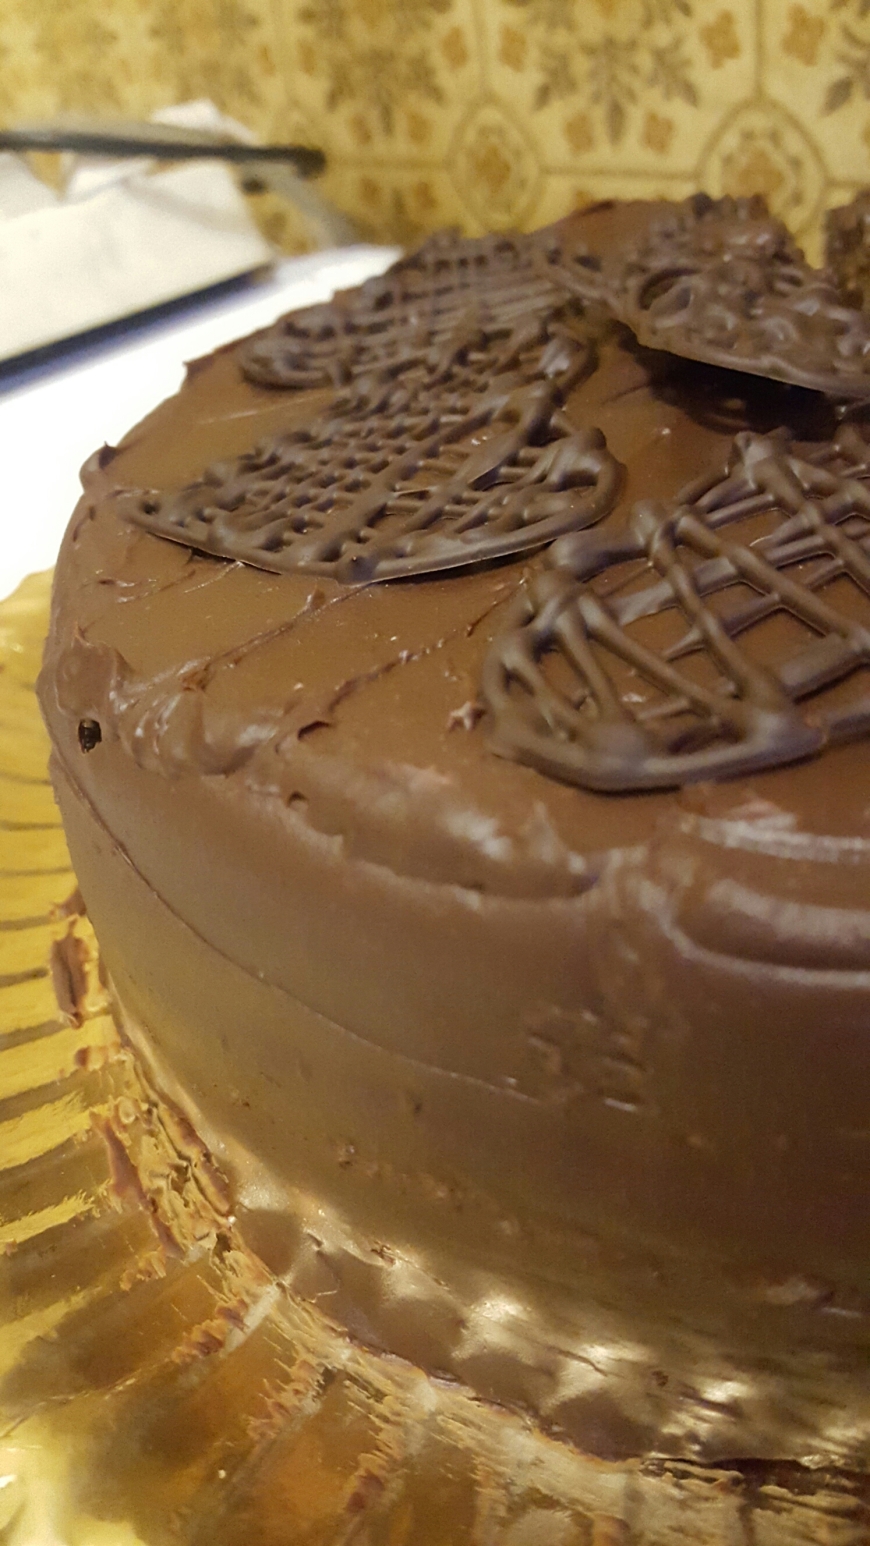
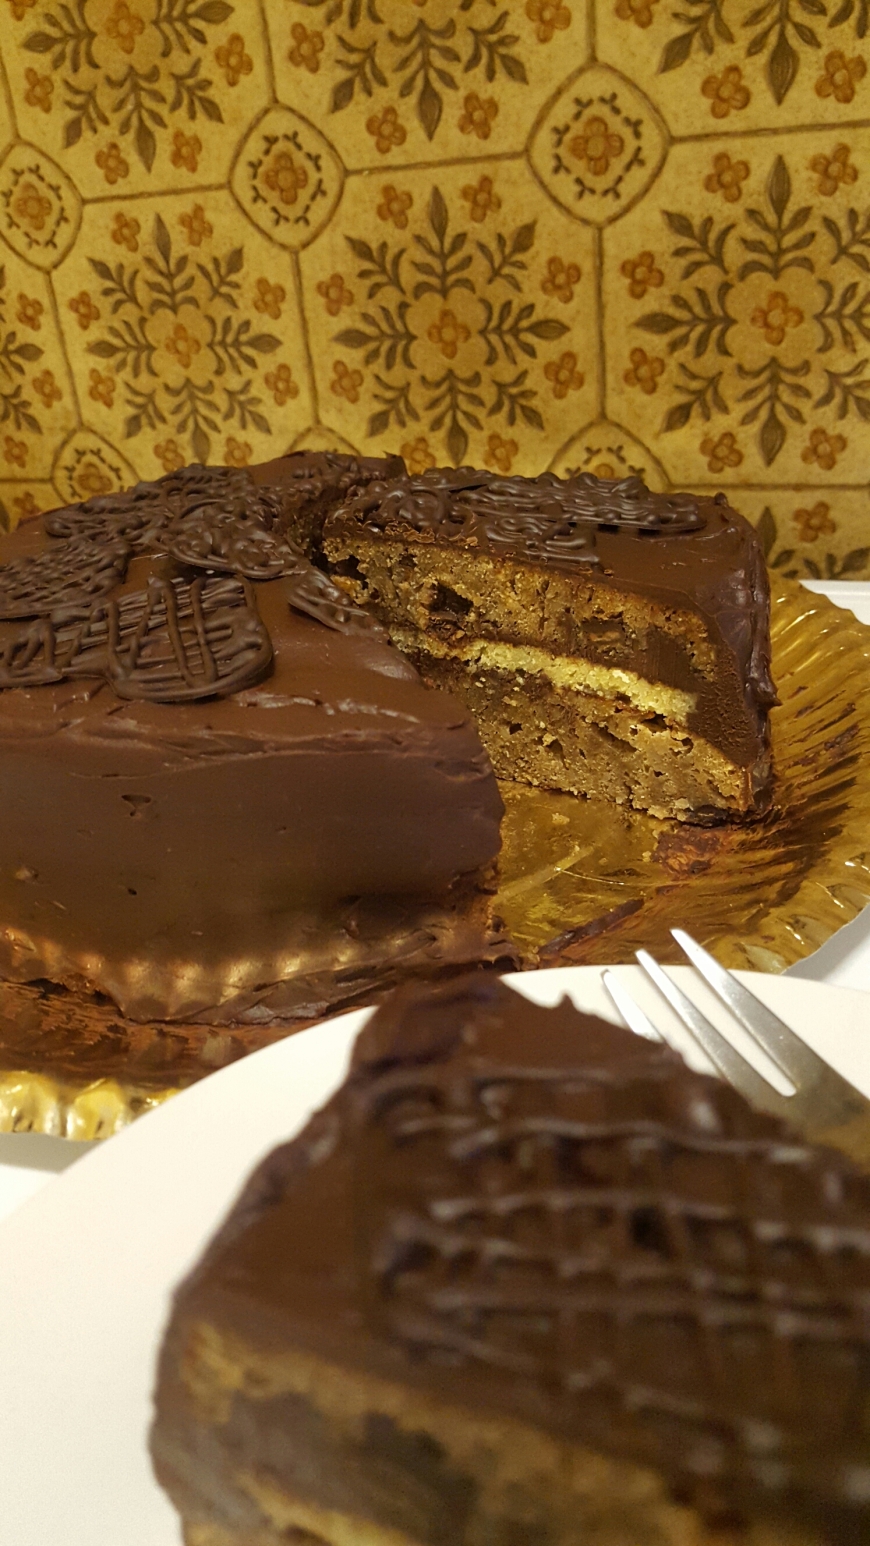
I really wanted to use that chocolate “structure” to decorate one of my cakes with. Finally did it. Well… they asked me if it’s a Christmas tree… and actually it was for my fiance’s birthday but… anyway. 😀
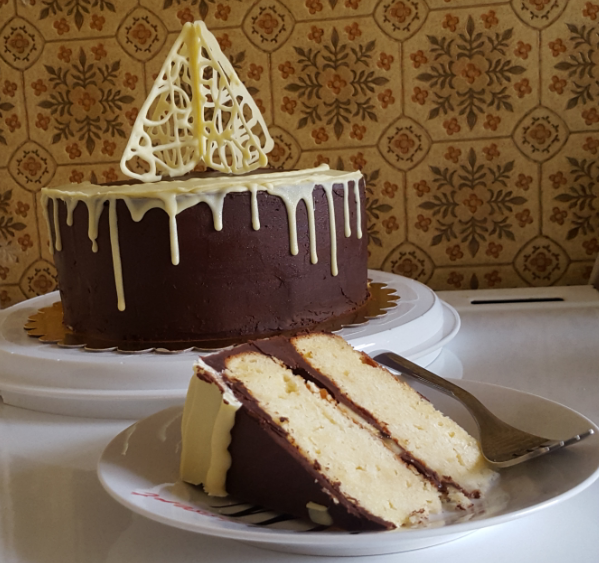
I did almond sponge covered with a lot of dark chocolate ganache and decorated with white chocolate. I find the taste of white chocolate too strong to use much of it. Actually… don’t juge me but I think white chocolate is not a real chocolate… Probably because I love chocolate but not this one.
Ok… Let’s move to cake.
For the sponge you will need:
250g of cake flour
100g of almond meal
1/2 teaspoon salt
325g of granulated sugar
280g unsalted butter
5 large egg yolks
7 large egg whites + 1/4 teaspoon cream of tartar
1 teaspoon almond extract
3 teaspoons baking powder
1 cup of milk
Mhm… pretty long list but finally you’ll have a great moist sponge.
Now preheat the oven at 180°C. Butter and cover with baking paper a 25cm cake pan (if you prefer baking the 2 layers separate you could. I just prefer baking one and cutting it later.)
Sift together flour, baking powder and salt.
Mix butter and sugar until light and fluffy. Add to them the egg yolks (one at a time). Mix and add almond extract.
It’s time to add the almond meal. Mix till incorporated. And start adding the flour mixture. Mix till batter is homogenous.
In a big glass bowl mix the egg whites and the cream of tartar till soft peaks start forming.
Now add it to the batter. Sloooowly stirring with a spoon. You want it to keep the maximum of volume.
When homogenous quickly pour the batter in the cake pan and it goes in the oven for around 45 minutes(if you bake 2 thinner cakes it will take around 30 minutes). But better always try it with a toothpick. It must go out clean.
When cake is ready let it cool completely.
I always prepare my chocolate ganache from the night before so it’s ready to go on my cake.
Here I give you the template I used for my decoration.

image

You just need to pipe with melted chocolate 4 identical pieces, let them set and glue them together with more melted chocolate where the x sign is. It is actually pretty easy. You could see photos of every step on my Facebook page. Just look for The Secret Life Of A Peach.

image

Hope you like my cake. And hope you are going to try it.
See you later!

Bon Appétit!
Christina
No-Bake Chocolate Tart

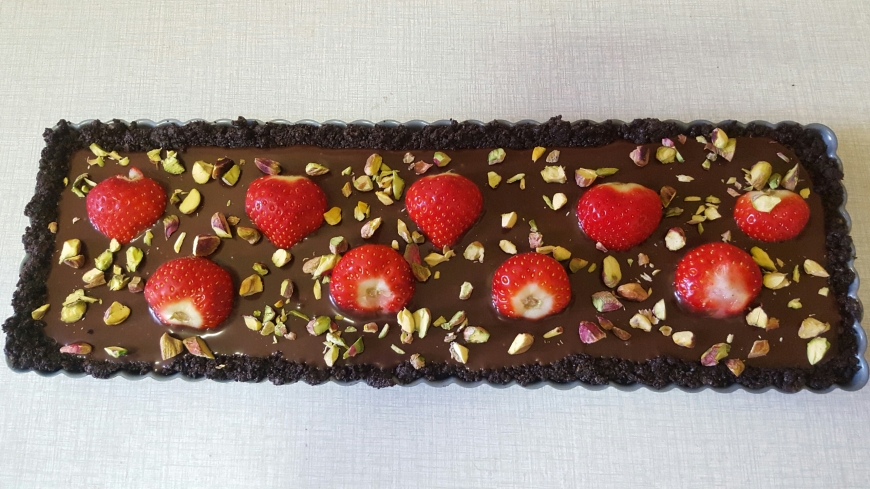
image
If you like chocolate and have no time to bake- that one is for you!
Oreo biscuits, chocolate ganache, strawberries and pistachios. Can you think of a better combination? For me it’s the perfect one.
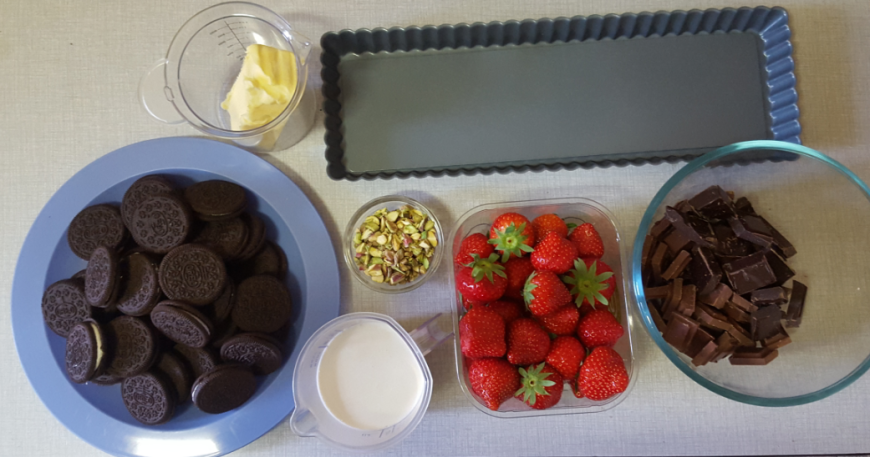
So here’s what you need:

image
32 Oreo biscuits
110g melted butter
200ml whipping cream
200g milk chocolate
100g dark chocolate
strawberries and pistachios for decoration
As I said no oven needed. Just prepare a tart pan (12×36cm).
First make the crust. All your biscuits go in the blender till crumbs. Then add the melted butter and blend again till it forms a paste. Press the mixture to the bottom and the edges of the tart pan. You can use the back of a spoon or your fingers. Then freeze till you prepare the filling.
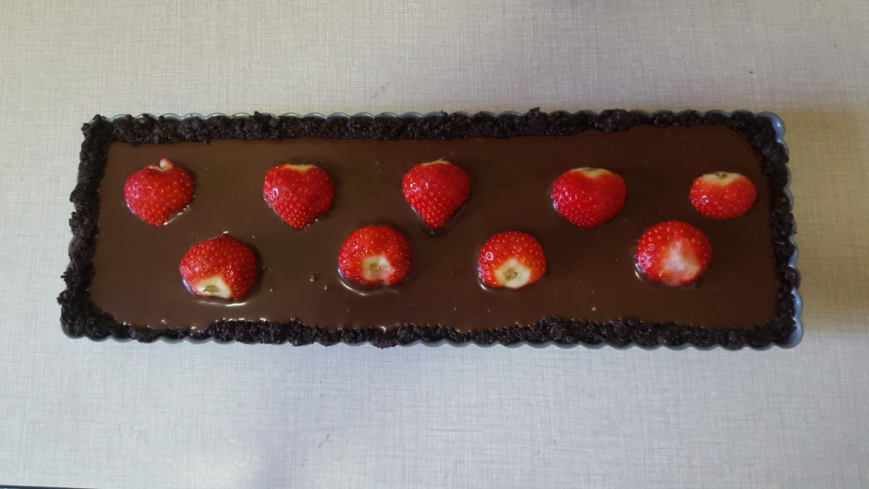
Cut all the chocolate in small pieces. Heat the whipping cream in a saucepan but don’t let it boil. Then pour in a bowl over the chocolate and let it stay for 1-2 minutes. Now mix with a spoon till all the chocolate melted.
Take the crust and pour the chocolate filling in it.

image

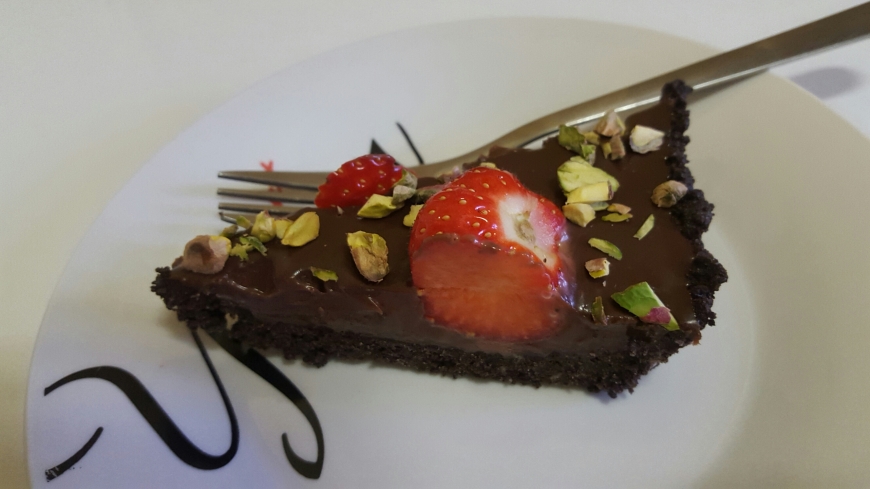
Decorate with the strawberries and the pistachios and put back in the fridge.
You can serve after 3-4 hours. But I recommend you to leave it overnight.
And now enjoy! And I am sure you will! It really is delicious!
image

See you later with some éclairs.

Bon Appétit!
Christina
Chocolate ‘n Hazelnut Cake

image

Sunday cake time! Yesss… And today I was like a crazy woman in my kitchen. Like someone never baked a cake in his life. Not knowing what I am going to do. No recipe. Just adding ingredients in a bowl and baking them after. And… well… the final result is a chocolate explosion in your mouth. So delicious that you don’t care about calories any more. Well… winter is coming… no more bikini so… i don’t care right now. (I hope my sport coach is not reading this! 😦)
I mixed a hazelnut batter from which I baked a really thin layer. After added to the rest of the batter cocoa powder and baked two thicker layers. And all that with a lot of chocolate ganache. Actually cake is not my thing… but chocolate one is something else. It’s the only cake that can make me eat it every day… piece after piece. Till get sick. That’s why I try to bake it rarely.
So if you like chocolate cake as I do try this one. Here is what you need:
For the chocolate ganache:
400g of black cooking chocolate
400ml of whipping cream
For the cake batter:
250g of white granulated sugar
250g of unsalted butter at room t°
100g all-purposeflour
200g of ground hazelnuts
3 eggs
1 teaspoon baking powder
1 teaspoon vanilla extract
a pinch of salt
3 tablespoons of cocoa powder  (for the cocoa layers)
Now preheat the oven at 180°C. In a big bowl mix butter and sugar. When fluffy add and mix the eggs and vanilla extract.
Mix together flour, salt and baking powder. Start adding it to the batter a little at a time. And finally hazelnuts. When well incorporated prepare a baking sheet. Butter and cover it with baking paper. Ah yeah… the size it- my cake pan is 23cm so I use 25cm square baking sheet. I am going to cut it later.
As I said I will add cocoa powder to the rest of the batter.
Be careful when baking the thin layer. It should be light golden brown. Mine needed around 13 minutes.

image

After bake the cocoa layers. Separately or bake one cake and cut it (as I like to do).
Let them all cool completely.
I always prefer using some syrup for my layers to keep them moist. For this one I made simple syrup and added some rhum to it. It goes well with the chocolate and hazelnuts I think.
My chocolate ganache was ready from the day before. You can see how I prepare it in my past post “The Flower Cake”.
Ensemble your cake and let it set in the fridge.
I decided to melt some chocolate and pipe chocolate hearts to decorate it’s top. Yeah… chocolate, chocolate and more chocolate!

image

Hmmm… It’s just delicious! But leave it out of the fridge about an hour before serving. It’s better.
Hope you like it!
Coming later with a Red Velvet Cake. Check it out!
See you soon!

Bon Appétit!
Christina
Nut Lover’s Cake

Now relax… Close your eyes… And listen to my voice… Let’s go back to your childhood.  You are playing with your toys and now you can smell something really nice. It’s coming from the kitchen. You run there and you see your mother (or grandmother) baking something. You sit at the table and she comes to you smiling with a small plate in her hands. What’s in there… Some cookies? Cake? Mmmm… And it tastes so good!
Yeeees! I think we all have that perfect memory from our childhood. We can still remember it’s odor and it’s taste.
From a while my fiance is talking about a walnut cake that his mother used to bake when he was a child. So I decided to ask her for the recipe and prepare it for him. Finally it was cake that she learned to bake from her mother. And she didn’t have the exact recipe but told me what she remembers.

image

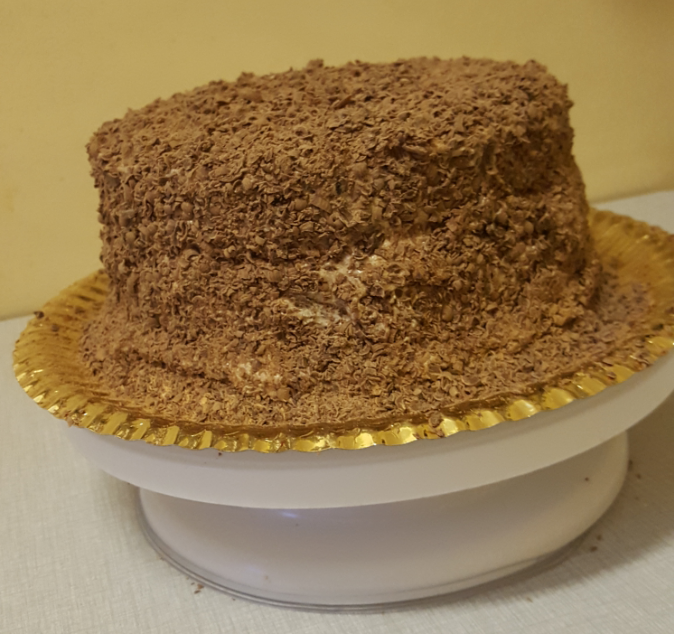
Yesss… i know… it looks reaaally messy! But wait to try it!
I also don’t like messy cakes so next time going to moderate the recipe and do my walnut cake. But if you want a dessert for your kids and family it really tastes great!
So if you want to try it you will need:
For 3 layers:
10 eggs at room t°
3 tablespoons of all-purpose flour
360g of sugar
470g of ground walnuts
For filling and topping:
200g powdered sugar
200g unsalted butter at room t°
1/2l milk
2 egg yolks
3 teaspoons of vanilla extract
1/2 cup of white sugar
250g of shredded chocolate
2 bananas
It’s a big cake for around 12- 15 servings.
So preheat the oven at 180°C. Butter and cover with baking paper a 23cm round cake pan. Baking paper is a must here. If not your layer will brake when you try to remove it from the pan. I know it because I broke the first one.
So take a big bowl. First mix your eggs, then add sugar. After start adding your walnuts and flour at the end. Separate the batter in 3 equal parts and bake each for 20-25 minutes. Let them cool completely.
Meanwhile prepare your cream. Actually it’s a strange  (for me, because I never tried it and actually didn’t know it exists) mix of butter cream and vanilla cream. First you prepare your butter cream. Easy one- mix butter and powdered sugar till fluffy and light. Then prepare a bain marie where you will heat your milk. After add the egg yolks. Don’t stop whisking! You don’t want your eggs to be cooked because of the heat. After is vanilla extract, sugar and finally flour. Whisk it and if you find it too runny don’t worry to add more flour. I didn’t and finally I regretted!
So leave your vanilla mixture cool completely! After start adding about a tablespoon at a time and mix it slowly with the butter cream. Actually the final result is really delicious.
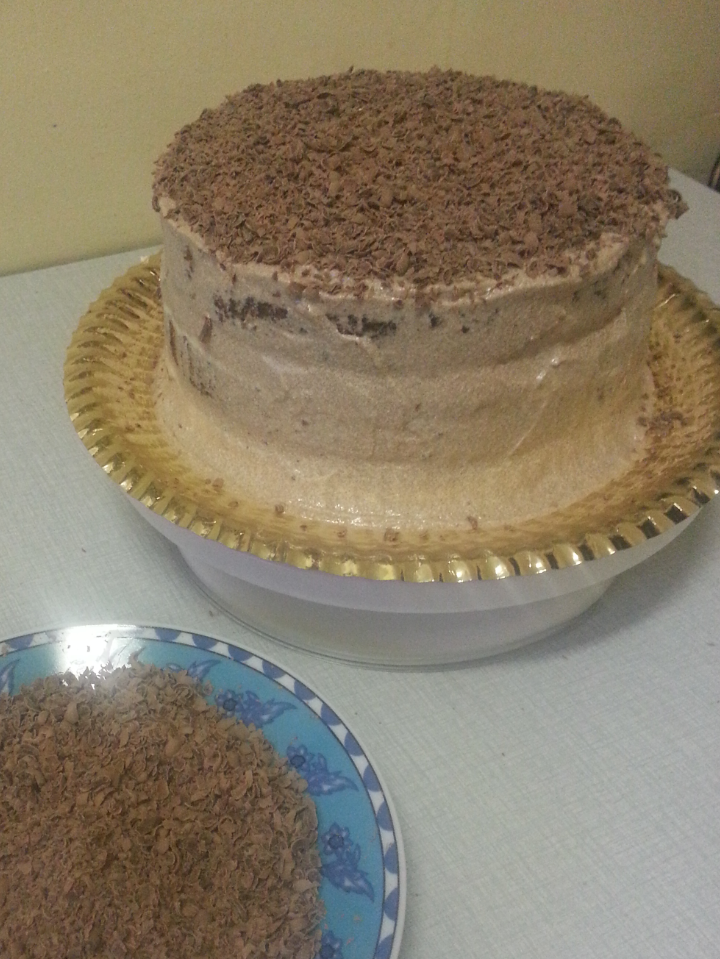
Now start building your cake. Cover each layer with syrup. It’s really nice to add some rhum in it. After cream and some bananas. Finally cover the whole cake with the cream and sprinkle generously with chocolate the top and the sides.

image

Let it set around an hour in the fridge and serve.
The best is- when my fiance tried it he said- Yes! That’s it!

image

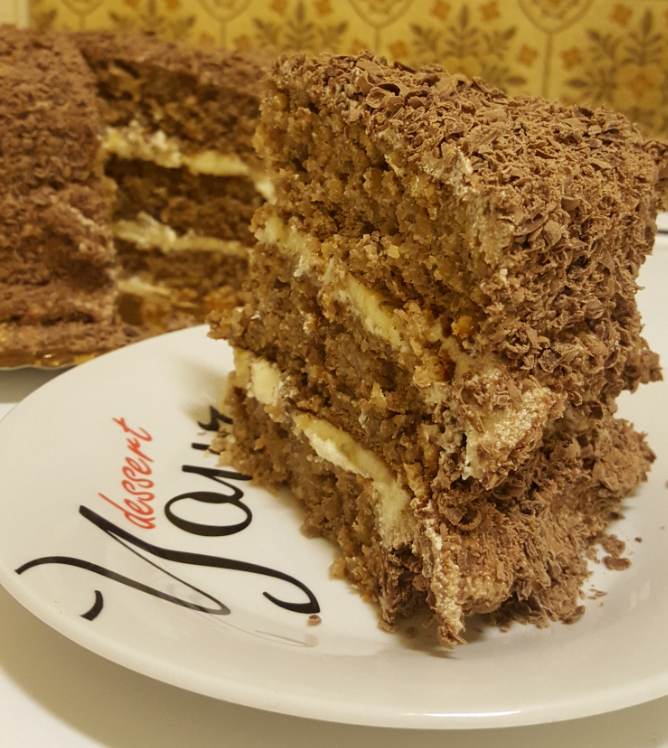
Looks like messy fluffy cake and tastes really good! Thank you grandmother-in-law!
Hope you like it!

Bon Appétit!
Christina
Battenberg Cake

image

When we talk about patisserie you will probably first think of France. Enormous variety of desserts… And all so delicious. But… I love England, English tea and English patisserie. How could you not love a country where tea is tradition?
Well today I decided to make my afternoon tea more special than the usual. So baked my first Battenberg cake. Decided to try it first because it’s beautiful and second because of its story.
Actually the Battenberg cake had its name in honour of the marriage of Princess Victoria, granddaughter of Queen Victoria, to Prince Louis of Battenberg.
So the cake is not only beautiful but romantic! Ahhh… 😊
So the recipe… I used the classic Battenberg cake recipe. If you also want to try it prepare:
175g of sugar
175g unsalted butter at room t°
140g all-purpose flour
50g of ground almonds
3 eggs
1/3 teaspoon baking powder
1/2 teaspoon vanilla extract
1 teaspoon almond extract
1 teaspoon rose extract
1 teaspoon red food colour
100g apricot jam
500g marzipan 
So… preheat the oven at 180°C.
In a big bowl mix first butter and sugar. After add almonds, eggs, vanilla extract and finally flour and baking powder. Now separate your batter to 2 equal parts. To one part add the almond extract. To the second one add the red food colour and the rose extract.
Take 2 20cm loaf pans and butter them. Cover with baking paper to be sure it will go out easily. Now the batters in the pans and they go in the oven for around 30 minutes or until a toothpick goes out clean.
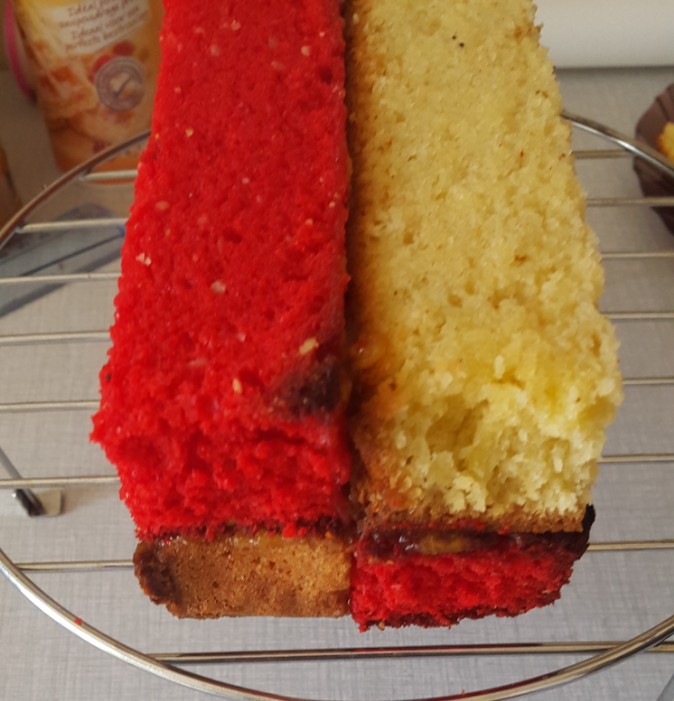
Leave your cakes cool completely. Then trim them. You need 2 perfectly flat and same size cakes. Put one on top of the other to check if they’re exactly the same and now cut them in the middle.

image

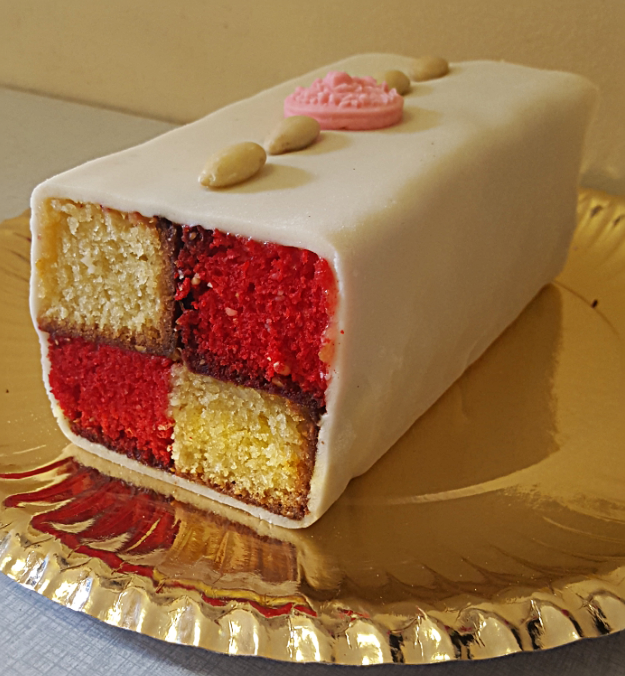
When one side is turned around it should look like this.
Now the easiest part – cover your cakes with jam to make them stick to each other. Press lightly.
Roll out your marzipan large enough to be able to cover your cake. Some more jam to the outside of the cake to make it stick to the marzipan. And cover.
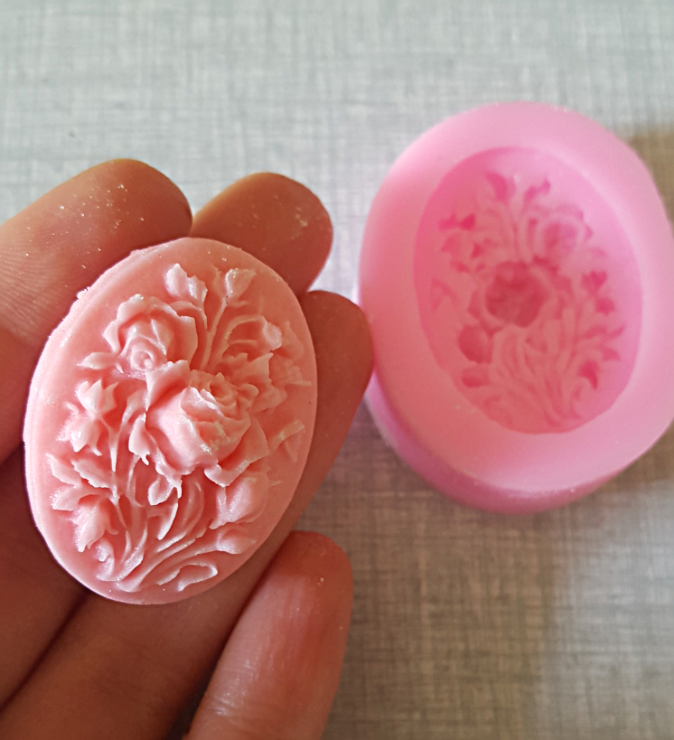
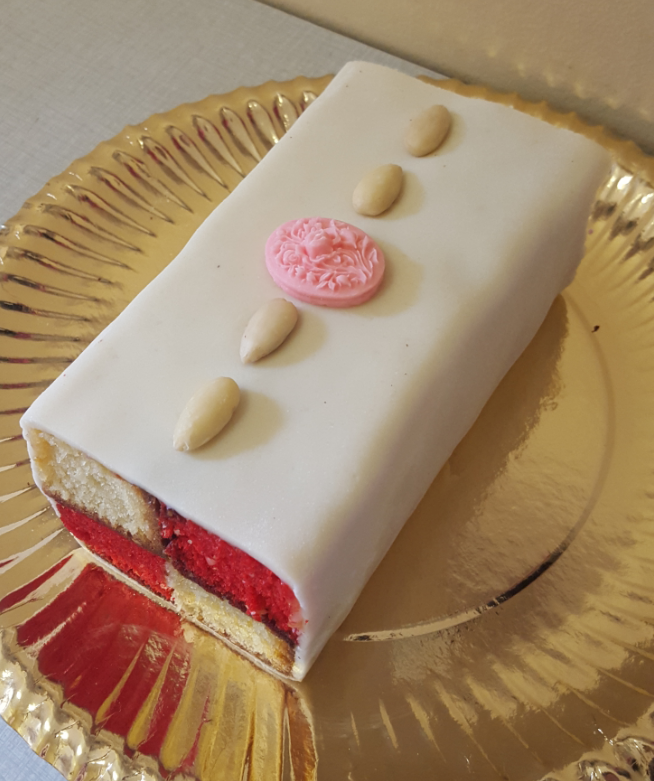
You can decorate it as you like. But believe me- even with no decoration it’s good enough! I used some almonds and a pink rose fondant decoration.

image

Now the most important part – make yourself a cup of tea and cut a slice of cake! Enjoy!

image

Bon Appétit!
Christina
Strawberry Birthday Cake

image

Love watching all that photos of cakes with surprise inside. I imagine… going to eat a piece of delicious cake is great… but when you cut it there is some surprise inside. And you’re like Wooow… cake is even better now, isn’t it?
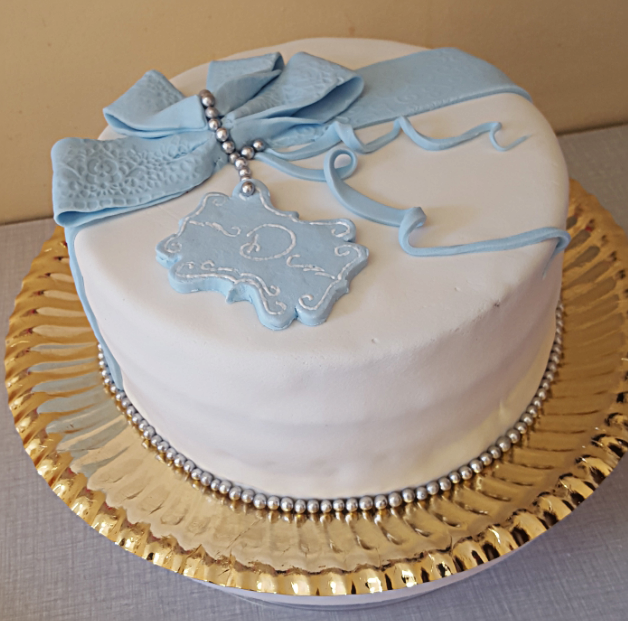
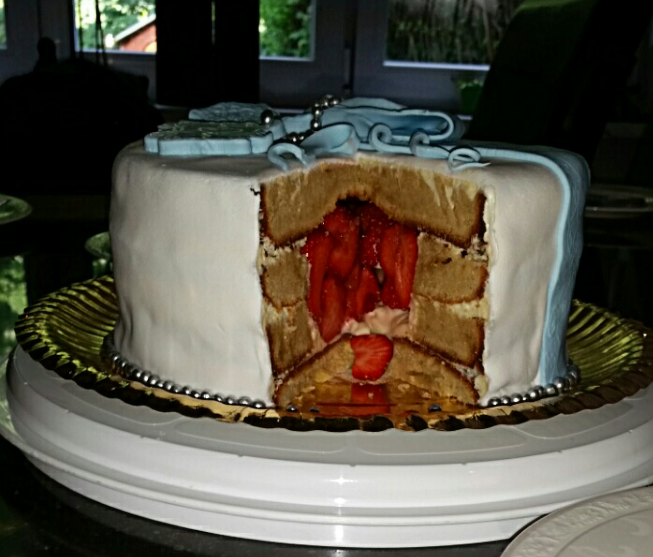
This week I had a birthday cake ordered. It was for a man so I wanted it to be elegant. I decided to decorate it like present box. And I was thinking – in the present box you should find a surprise inside, no! So this is the perfect occasion to make a surprise cake.
As they ordered me a vanilla cake I decided to put some strawberries in the middle of the cake. It will be nice with the cheese cream I am going to use for it. It will be 4 layered cake. And finally fondant to pack the present.
For my 4 layers I used:
8 eggs at room t°
160g of unsalted butter at room t°
2 cups of milk
2 vanilla pods
500g of all-purpose flour
4 cups of brown sugar
1 teaspoon baking powder
1/2 teaspoon salt 
Preheat the oven at 180°C.
In a bowl mix the flour, baking powder and salt. In second one first mix the butter and sugar while fluffy. After add the milk and vanilla. Then the eggs. For them I started using different technique. I separate the egg whites and yolks. Mix them separately and after I add in the batter the yolks and the whites. They say it adds extra moisture to your cake.
Finally mix the ingredients from the two bowls. Separate the batter in two or four equal parts. I baked 2 cakes and cut each to two layers. But if you prefer you can bake the 4 of them separately.
The reason I’ve changed the white sugar with brown is again the moisture. But you can do as you like.
So bake around 35-40 minutes or a toothpick goes out clean. Then leave them cool completely.
It prepared also the cheese cream I used for my “Fruit Salad On A Cake”. You can find it several posts down. I really love the taste of it and how smooth it is. I  think it goes perfectly with the strawberries.
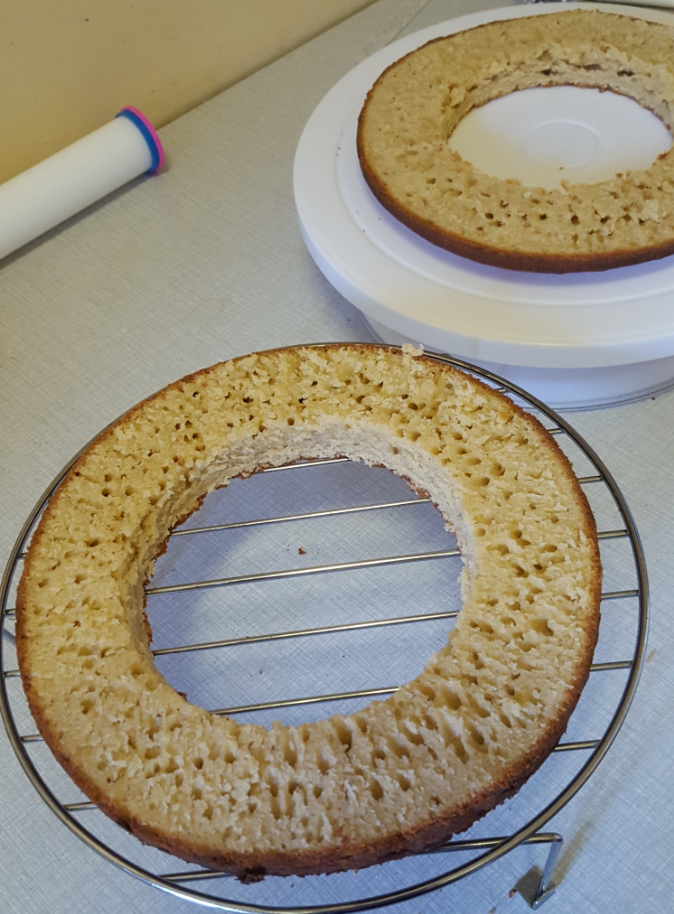
Now when cakes are cooled you can choose which goes on bottom, top and the two in the middle. Take the last two and with some shape or a bowl cut them in the middle so you have two cake rings.

image

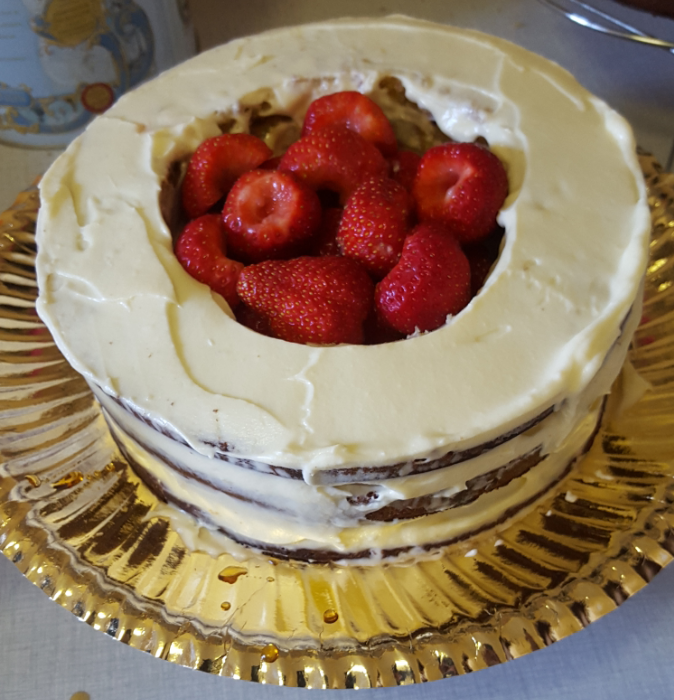
And start constructing 😊
Before putting cream on each layer don’t forget to put some syrup on it.
When you get ready with the first two layers fill the whole you have in the middle with strawberries. And finally the top layer.

image

When ready leave it to set in the fridge for around 30 minutes.
Meanwhile you can get ready for your decoration.
Now my surprise cake is ready, delivered and I already had a message saying it was really beautiful and yummy!

image

Now when relaxed going to bake some “Leftovers Biscuits” for a friend and cheescake for the family.
Ah… could spend the entire weekend in the kitchen!
See you soon!

Bon Appétit!
Christina
In Love With Cinderella

In my past post “My Cake Project” I was talking about making a doll cake. Actually all the cakes I baked till this Saturday were only for practice and of course for fun. This doll cake was my first ordered cake for the 9th birthday party of a girl that just loves Cinderella. So I was pretty stressed for it. When you bake a cake for pleasure even if it’s not well done- it’s OK.  But when someone, especially when it’s for a child, is waiting for your cake, well… you don’t want to ruin the party. So the cake must be perfectly done.
I spent a lot of time in thinking about the design of the cake, watching YouTube videos of decorating Cinderella’s cake. (Thank God YouTube exists!). Finally I had no idea how the dress will look like. I just bought enough light blue and white fondant and started baking my cake.
Oh yes… again I had plenty of presents from my favourite shop Alice Délice. Like 5 or 6 different decorating tools. It is so much fun shopping there! 😊
I used “My Flower Cake” recipe and I baked one cake in a ovenproof bowl and a normal 23 cm round cake. From two of them I cut 5 layers. With a biscuit shape I cut a hole in the middle of all layers that’s large enough for my doll to go in. Don’t forget also to check the hight of your cake. When you put the doll inside she must be covered till the mid of her hips. When you put your cream between the layers it will go up.
For my cake I used chocolate ganache. This time I kept it in the fridge for a while because it was really hot outside and my ganache was too runny. And also added some sliced bananas over every later of ganache. I just find banana tastes really good in a cake. Whatever if it’s chocolate ot butter cream. 
So… till here everything was nice. Nothing I’ve never done. I was mostly stressed about the outside of it. She’s a princess and must look like one.
Put out all my decorating tools, prepare fondant, put the cake out of the fridge. Get ready… Start decorating! Yes… surprise – I was so concentrated in my Cinderella that I forgot to take photos of the different stages of my work. Funny, isn’t it?
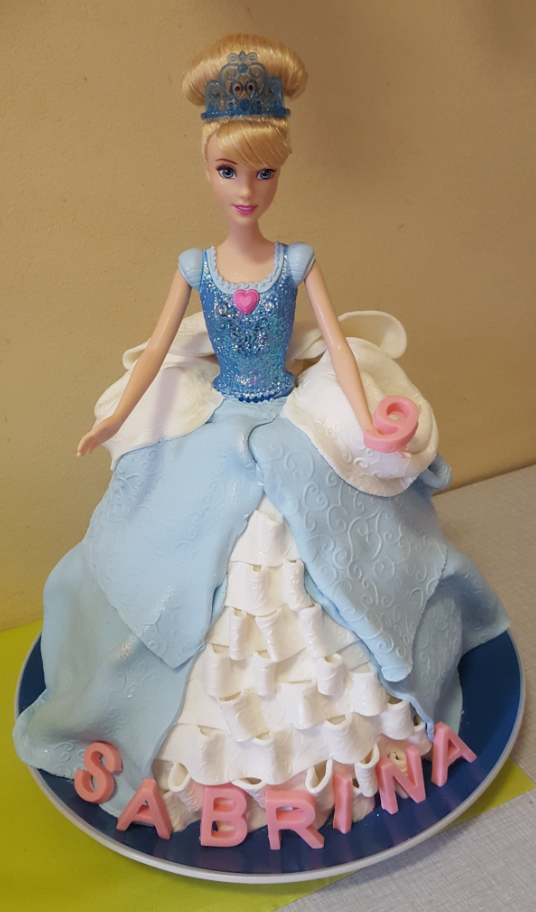
Well… after 2 hours of decorating, all my kitchen covered with powdered sugar and fondant, my hands sticky… but she is so beautiful! Really can’t believe I did her by myself!

image

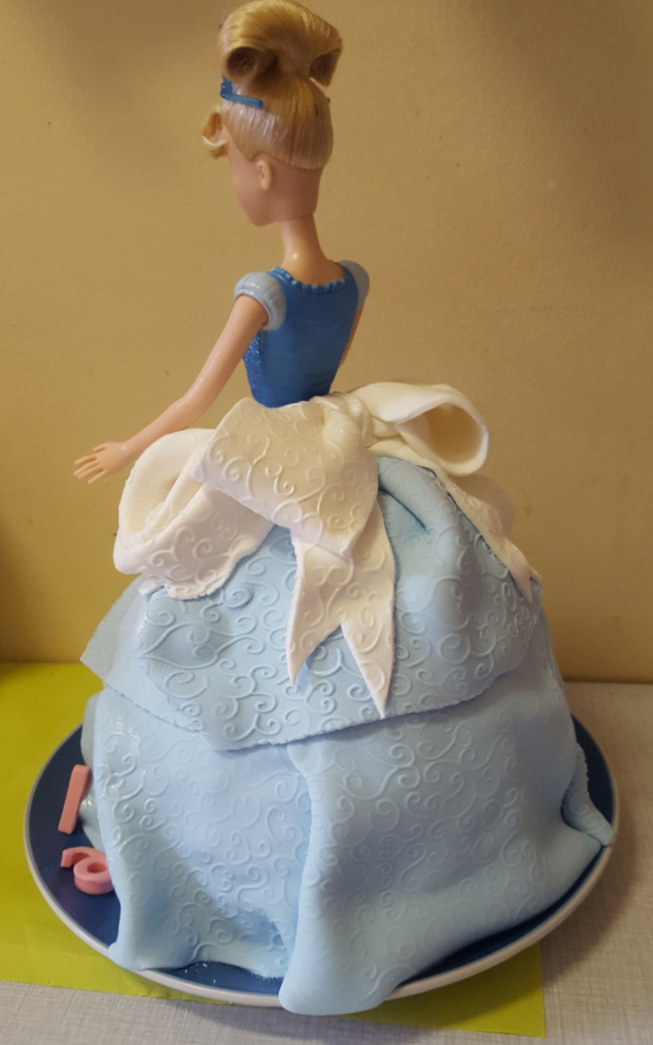
And the back of her dress as pretty as the front 😊

image

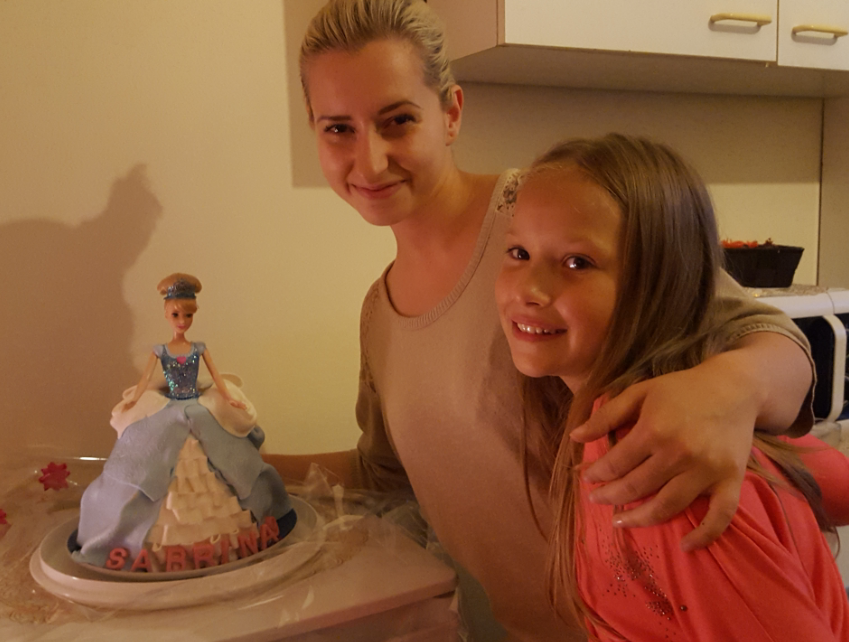
So no more stress! I was proud to go to the birthday party with my Cinderella! And the best compliment was of course made by the birthday girl telling that she never had a cake beautiful as that one!

image

Well… that was a successful weekend. Going to have fun next weekend with other birthday cake that will be like present box.
See you soon!

Bon Appétit!
Christina
Fruit Salad On A Cake

image

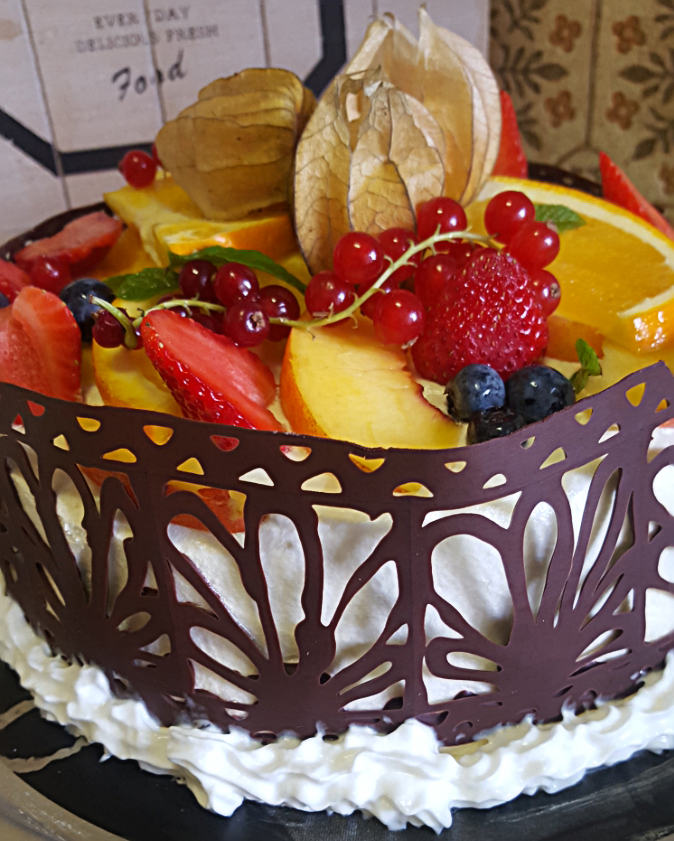
I was asked by someone really special to me to make a fruit cake. And as I want to always try something new to decorate with, today I decided to do a chocolate lace for my cake.
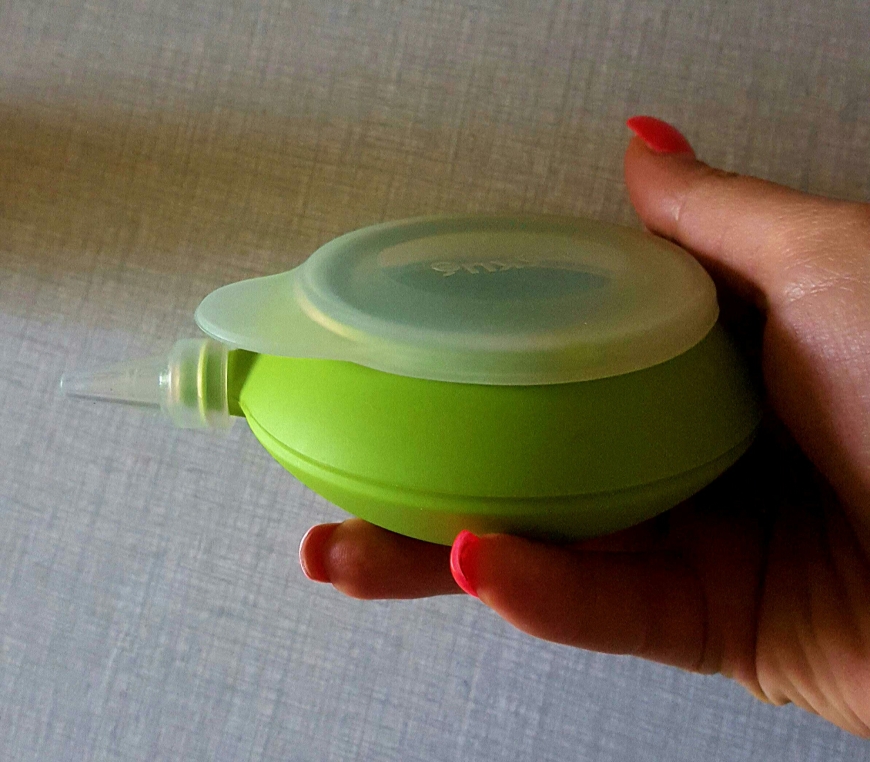
I’ve never done that before. To be honest it was not as easy as it looks like. I had also some technical problems – my fridge is not big enough for one long lace so I needed 2 short. I have also done bad choice for my piping tool. I took that one on the photo instead of piping bag

image

Baaad! Maybe some people like it but I find you don’t have much control with it. My chocolate was perfectly melted but you should squeeze hard. And sometimes while squeezing I had chocolate going out of the sides… air also. Really bad choice. Next time going for the simple baking paper piping bag that I do by myself.
Finally it was difficult to put the two pieces perfectly next to each other on the cake. Yeah… I would be surprised if it was perfect from the first time but I really like when things happen as they should be.
Now for the cake… Actually I think I always do the same cake but with different colours and flavours. Used for it:
4 eggs
1 cup of milk
1 teaspoon vanilla extract
1/2 teaspoon salt
1 teaspoon baking powder
2 cups all-purpose flour
80 g of butter at room t°
2 cups of sugar
Mixed in a bowl dry products. In second one first mixed the butter and sugar while fluffy. Next added the milk, eggs and vanilla extract. Finally put everything together and out batter is ready. I bake it in preheated oven at 180°C for about 50 minutes. When ready leave it cool completely and cut in two layers.
While the cake is cooling we can prepare that yummy cheese cream. You will need:
250g of cream cheese  (I used Philadelphia)
1 cup of butter at room t°
300g of confectioner’s sugar
3 teaspoons of vanilla extract
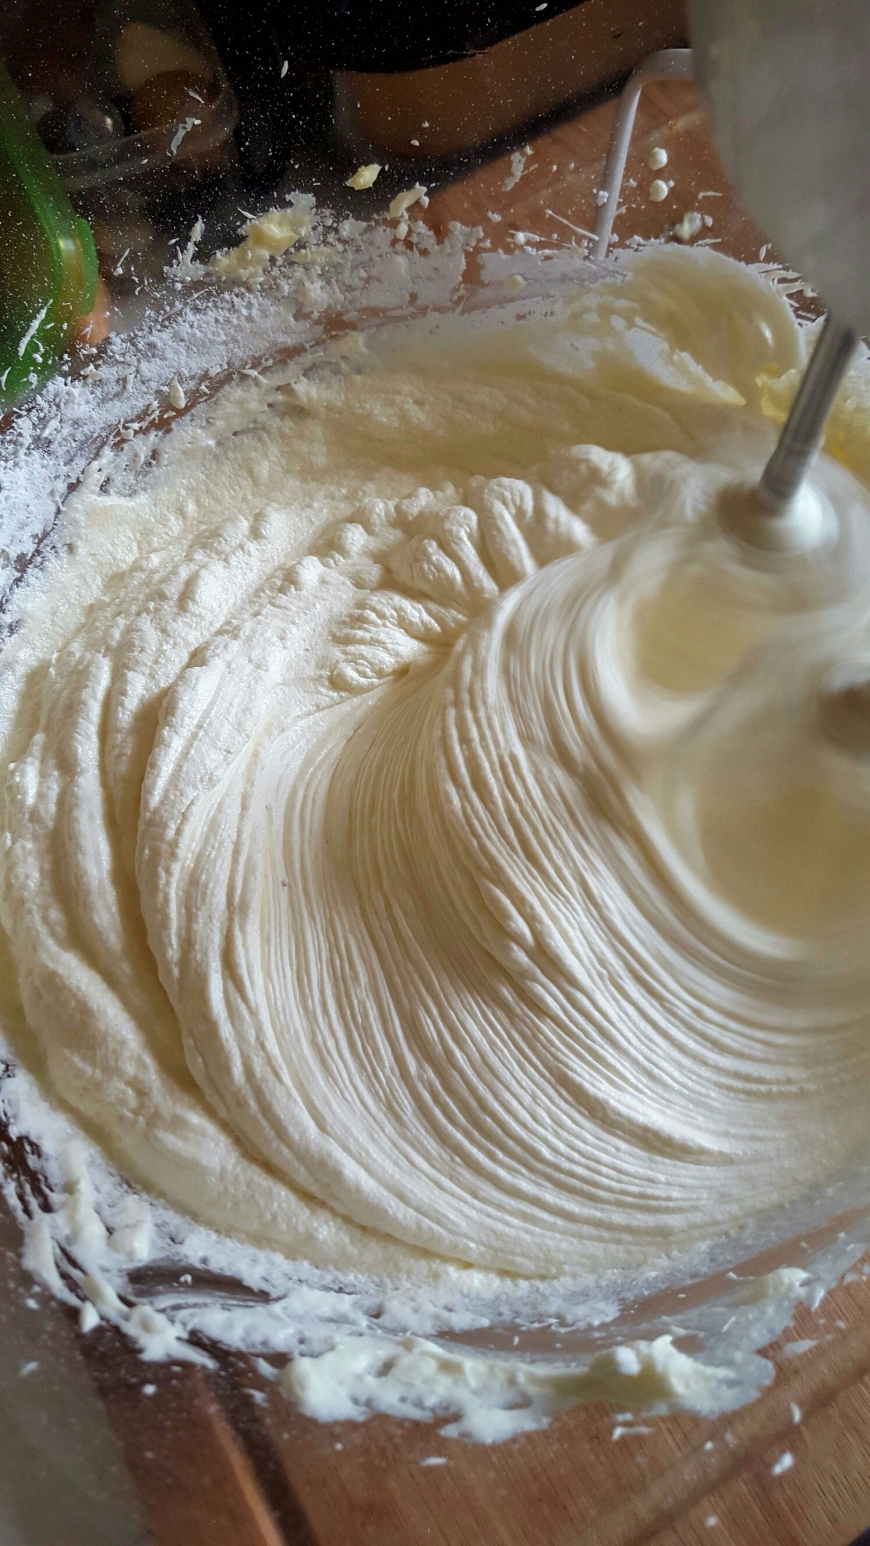
We prepare it the same way as butter cream. Now take your mixer and be ready for the big mixing. First mix well your cream cheese and add butter. Mix while it becomes really light, almost white. After start adding the sugar. Add 1/2 cup at the time. Mix at high speed. Finally add the vanilla extract and continue mixing around 5 more minutes at high speed.

image

Now… We have 2 completely cooled layers and our cream. I will cut a banana and start building my cake. So take the first layer, put 4-5 tablespoons of syrop, cream and on top of it I put the banana I sliced. Second layer on top and again 4-5 tablespoons of syrop. Now for 10 minutes in the fridge to settle.
It’s time to cover our cake. Take your spatula and do it smoothly. Don’t worry if it’s not perfect. No one will see it 😉 And again in the fridge. This time for 30 min. Don’t forget to leave some cream for the border at the cake base that we will do later.
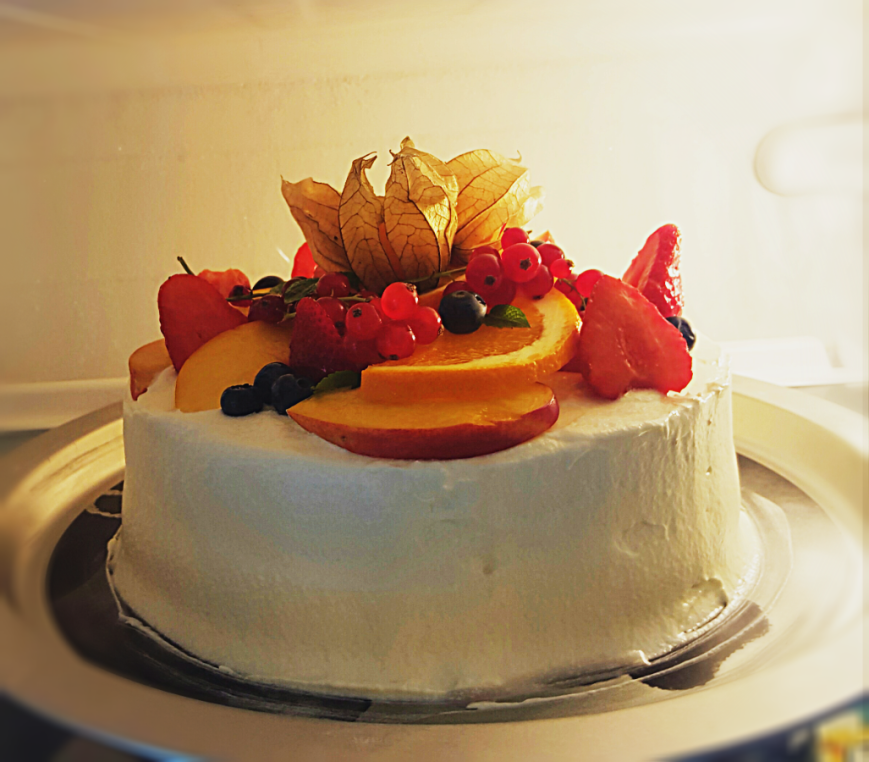
While it’s in the fridge prepare the fruits you will put on top of the cake to decorate. Try to have different colours- it’s cuter.
Now time for fun. Let’s put the fruits on the top. You can do it as you like. I prefer it messy. Like I have all my fruits in a basket. When ready it goes back to the fridge so we can prepare our chocolate lace.

image

Nooow… Let’s see what can we do with the chocolate we have. First you should mesure your cake to know how long and high your lace should be. Then cut a peace of baking paper. Do it with 1cm higher and 3-4 cm longer. Now take a pen and do your lace design at the one side of the paper. The extra centimetre in the hight should stay free. No chocolate on it. So when you move it you have some space for your fingers.
For my lace I will melt 200g of cooking chocolate. I want to be sure it will be enough. So it goes for 1 minute at 600W in the microwave. Mix and if it’s not completely melted put back in the microwave. Then put the chocolate in your piping bag or whatever you are going to use. And now start drawing on the baking paper. Of course not on the side you did your design but on the back. Follow your design. Try to work quickly. When you’re ready put it in the fridge. Be careful when moving it. And have an eye on it all the time. It must settle but not for two long. When you take the baking paper the chocolate must be still pliable.
And now it’s the most difficult part… well… for me.
Prepare the cake on your working surface. Take the baking paper and start placing it. Start from the back side of your cake. Press it lightly at the beginning and after just roll it around your cake with no pressure. Be careful to roll it straight. Use your plate as a guide at the bottom. When you come at the end press again lightly to connect the two ends of the lace. You will have some axtra of it… don’t roll it over. Just leave it hanging there.
Oh… I hope you did it better than me.
So that cake goes back in the fridge while chocolate is completely cooled. Mine was ready for about 10 minutes. But it depends on your fridge. You can be sure it’s ready when you see the backing paper separating from the chocolate by itself. Then take the end of the baking paper and put it away. It must go easily with no pressure. If not- that means your chocolate must cool for some more time. Finally take a hot knife and really carefully cut the extra chocolate.
Go back to your cheese cream. Put it in piping bag and make a border around the base of your cake.
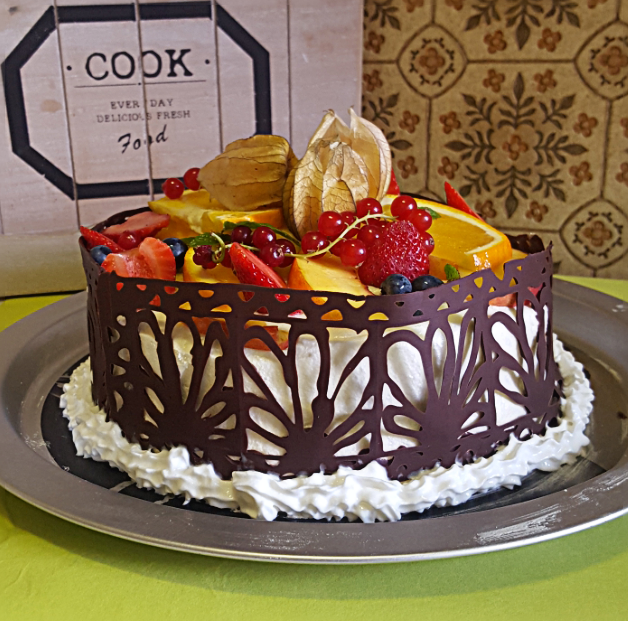
And here it is! Our cake is ready! As yummy as pretty. We did a really good job today!

image

I hope you enjoyed it. And you know… I am waiting for you advices. Would love to hear about your experience.

Bon Appétit!
Christina